Color-changing LED strip lights are prone to malfunctions. So, you’re probably wondering, why your LED lights only show one color (red, green, blue)? Don’t fret! We’ll tell you how to fix that.
Contents
Why Are My LED Lights Only One Color?
Color-changing LED strip lights can produce any color hue by mixing the primary colors red, green, and blue. The RGB controllers work by altering the power on each of the three colors to create a specific color mix.
For example, if you choose the purple light on your controller, the red and blue lights will be wound up, while the green light will be off. Mixing the blue and red lights together at certain shades will give you the purple color you’re aiming for.
All this process happens within a small circuit inside your controller. Just like any electronic device, the RGB controller is prone to issues and malfunctions. One of the common issues that you might face is stuck LED lights.
Also, LED lights display one only color if there’s a loose cable or an improper power source. Additionally, the changes you make to the controller settings over time might cause this problem.
How to Fix LED Lights That Display Only One Color
If you have new LED lights, you need to make sure that they support color changing first. As obvious as it may sound, you might’ve simply bought single-color LED lights!
After making sure your lights are color-changing, you can then proceed with the following steps to fix your problem:
Make Sure That Everything Is Plugged in and Secure
A loose cable or incorrect wiring can sometimes cause this issue. So, the first thing you need to check is that everything is plugged in correctly.
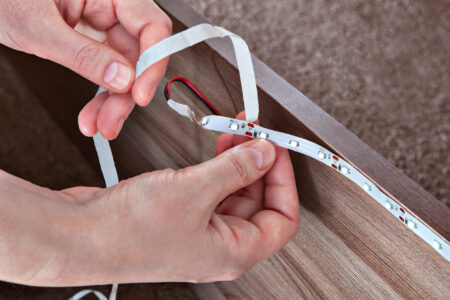
For starters, make sure that the RGB’s black wire on the strip connector is on the same side as the 12V.
Next, ensure that the positive end of the connector lines up with the positive end of the strip.
Lastly, you need to confirm that all the R, G, and B wires are connected correctly and securely in place.
Check the Power Source
Most LED lights are either 12V or 24V. Generally, having a power source that’s higher than the LED’s voltage can damage them permanently.
On the other hand, having a lower voltage may lead to reduced brightness and cause some colors to get stuck.
For instance, if you connect a 24V light to a 12V power source, the LED might not be able to create some colors. So, you need to make sure that your power source has the right voltage, especially when using batteries to power your LED lights.
You’ll need to calculate the voltage of the power source to make sure it’s right. For example, let’s assume you have a 12V strip that you want to power with AA batteries.
Each AA battery produces 1.5V. Therefore, you’ll need 8 batteries to power the lights. That’s because 8 x 1.5 = 12V.
Additionally, you need to make sure that the batteries aren’t running low. If you suspect that’s the case, you might need to replace or recharge them to get the LED lights to work properly.
Reset the Controller
To reset your controller, you need to locate the reset button. It’s usually on the back of the controller.
Some controllers don’t have a physical button. Instead, you’ll find a small hole with a reset label on it. You’ll need a pointy object, like a pen, to insert into this hole.
Then, hold down the reset button for around 10 seconds. Finally, release the button and wait for the controller to finish the resetting process.
Reset the LED Lights
Resetting the LED lights can fix many issues, as it turns them back to their original settings.
To reset your LED strip, plug the unit into the power source. Then, locate the physical reset button. Typically, you can find it on the back or the side of the unit.
After that, press and hold the reset button for 3 to 10 seconds. In some cases, you can only access the reset button by inserting a pen or a pointy object through a small hole.
After 10 seconds, release the button and wait around one minute. Next, unplug the LED lights and wait for another minute before plugging them back on.
If you can’t find the reset button on your unit, you can try holding down the power button for 10 seconds. In case that doesn’t work, check the manufacturer’s guide on how to reset your unit.
For some brands, factory resetting requires turning the power on and off a few times. Here’s how to do it:
- Plug in your LED and turn it on for a few seconds.
- Turn it off, then take the power adaptor out without turning off the remote.
- Hold the power button for at least five seconds, and then turn off the power.
- Wait for at least three seconds then turn it back on for another five seconds.
- Repeat the process four times.
Check the Controller’s Batteries
In some cases, the RGB remote might be the cause of this issue. It might be damaged or running low on power.
Since the majority of RGB remotes don’t have battery indicators, you might need to replace the batteries regularly to make sure they aren’t out of power.
Some LED lights have an app or another controller. So, it might be a good idea to try changing the colors using one of these methods.
If it works, that means you have a problem with your controller. Luckily, you can easily find a compatible remote online.
What to Do If You Can’t Fix the Issue of LED Lights Displaying Only One Color?
If the previous steps didn’t help you fix the issue, you might have a damaged LED strip or controller. In this case, you can try replacing both or either with new alternatives.
It might be a good idea to contact the manufacturer for further help.