LED strips have become very popular in recent years. One reason for this are their low prices. But especially the easy installation and the great lighting effects are the real highlights of LED strips. Here you can learn how to bring your LED strips to the right length in simple steps and then install them for your application.
Contents
Installing LED strips
Today there are countless variants of LED strips on the market. Whether single-color, dual-white or in colorful RGB version: For every application you will find the right LED strip. The great popularity is mainly due to their easy installation. Especially as decorative lighting, LED strips can be easily used.
Only a few steps are necessary for mounting:
- Shorten (or extend) the LED strip
- Lay and fix the LED strip
- Connect LED strip with transformer
- Switch on and enjoy the great lighting
The first two steps can also be combined depending on the installation location. For short strips, such as for installation on shelves or other furniture, it is often useful to first cut the LED strip to the required length and then attach it.
For long strips, such as for wall installation, it is usually easier to stick the LED strip directly when unwinding it from the roll and cut it off at the end. Once the LED strip is attached, it only needs to be connected to the transformer or LED controller, depending on the variant. This is done with many strips via simple connectors.
After that you can already enjoy your new LED lighting. Here you can find some further ideas for your strip lights. In the following sections you will find all the details for installing your LED strips.
Shorten LED strips
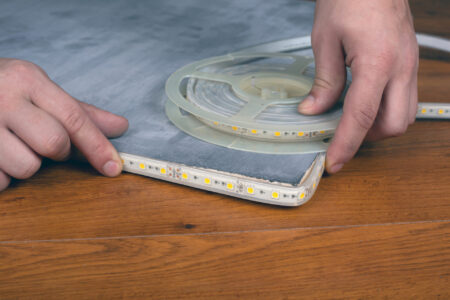
The structure and division into many small segments are a great advantage of LED strips. The strips are produced by length and sold in many different lengths mostly as multiples of 3.3 feet (one meter) and usually delivered on a roll. The most sold LED strips are 16.4 feet (5 meters) long.
Between two segments, the LED strips can be cut and shortened to the required length. The beginning and end of a segment are marked with a cutting mark. The marking may vary depending on the manufacturer. On the LED strip shown, the cut marks are indicated by a continuous white line through the contact surfaces.
How long is a segment?
The length of a single segment depends on the type of LED strip. For a 12V strip with 18 LEDs per feet, the segment length is about 2 inch. A 24V strip would have 6 LEDs per section, which doubles the segment length to about 4 inch.
To shorten the LED strip, you can cut it with a pair of household scissors at the appropriate cut mark. Make sure to use clean scissors so that the contact surfaces do not get dirty.
Since the flexible carrier material is very thin, the strips can be shortened very easily without much effort. But this only applies to the unprotected LED strips for indoor use. Waterproof LED strips are encapsulated in epoxy resin and are therefore somewhat more difficult to cut. Also the cut is no longer protected against moisture afterwards and must be resealed.
Is it possible to cut between the cut marks?
All the LEDs within a segment are electrically connected in series. If you were to cut the strip at any other point between the cut marks, all the LEDs still present in this segment would then remain dark. Therefore, you should always pay attention to the cut marks.
Extend LED strips
Fortunately you can not only shorten LED strips but also connect pieces of strips together. This is useful if you want to make a long LED strip from already existing parts. It can also happen that two 5m strips should be extended to a 10m strip.
Extending with quick connectors
The easiest way to extend two parts is to use a special connector. Each section is placed in the connector on one side. The contact surface must rest on the four metal clips. After closing the hinged cover, the contact is made and both strips are fixed against slipping out.
This type of extension is very simple and quickly done. A small disadvantage can be that the connector is a little thicker and the LED strip becomes a little thicker at one point. If this is impractical at the mounting location, the sections can alternatively be soldered together.
Soldering sections together
At each beginning and end of a segment there are small contact areas on the LED strip. If you are proficient in soldering, you can simply solder two sections of an LED strip together. To do this, both strips should be placed a few millimeters above each other and the opposite contacts should be soldered cleanly.
The fact that several short strips have been extended by soldering to form a long LED strip is hardly noticeable in practice. In many cases, LED strips are produced in 50cm sections anyway and then also soldered together to the lengths available on the market.
Laying LED strips
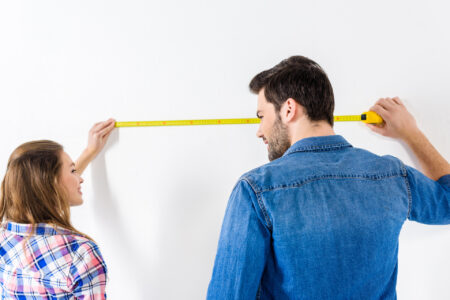
LED strips are very easy to install due to their high flexibility. But before you attach the strip in the next step, you should first lay it out for testing. This way you can check if the length fits and if the connection point is in the right place.
You can also lay an LED strip around the corner. Make sure that the bending radius is at least 0.5 inch. The strip must not be bent, as this could break the conductors or solder joints. For a sharp 90° angle, there are also special corner connectors.
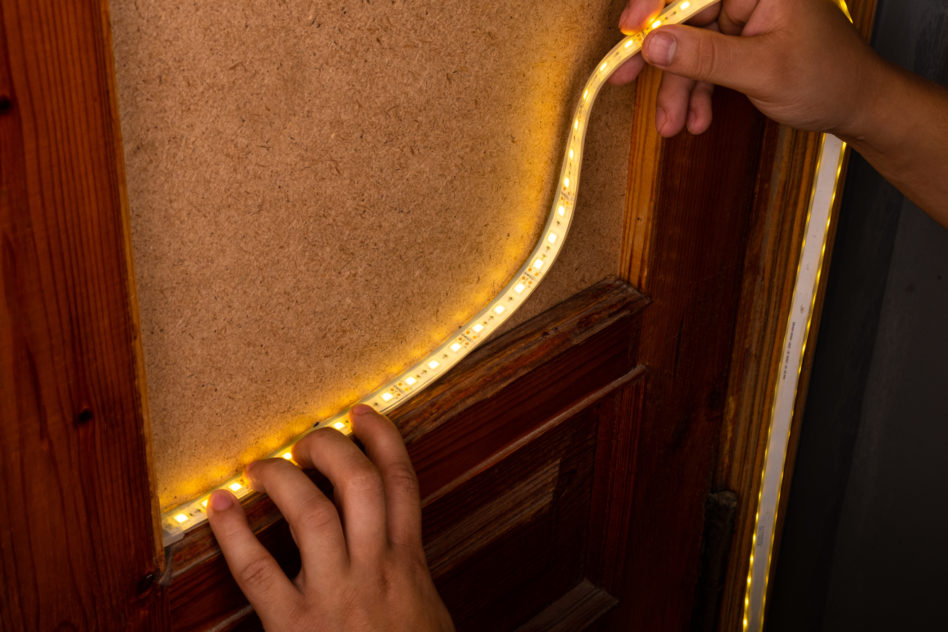
Fixing the LED strip
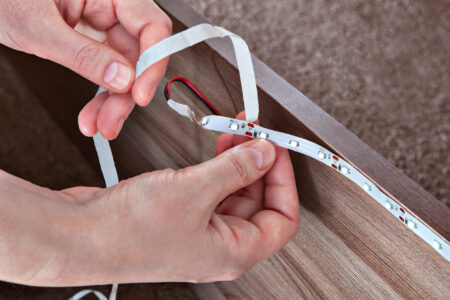
Most LED strips have an adhesive strip on the back for easy attachment. It sticks to many smooth surfaces, such as glass, wood, metal or stone. Before sticking, you should first clean the surface. Then you can place the strip in position and peel off the protective film on the adhesive on the back on one side. You can then stick this starting point at the mounting location.
Then you can peel off the protective film piece by piece and glue the strip. Make sure that there are no waves in the LED strip. It is advisable to press the strip only lightly at first. This way you can still make small corrections if the strip is crooked. Only when everything fits, you should press the strip really tight. The strip should not be removed too often, as the adhesive strength decreases each time.
Connect LED strip
After the LED strip is finally attached, you can connect it to the power supply or LED controller and neatly lay the cables. Some LED strips have a fixed feed point, other variants have a connector similar to the quick connector, but with a cable on one side.
The connection cable is connected to the LED controller. Depending on the manufacturer, different connectors can be used.
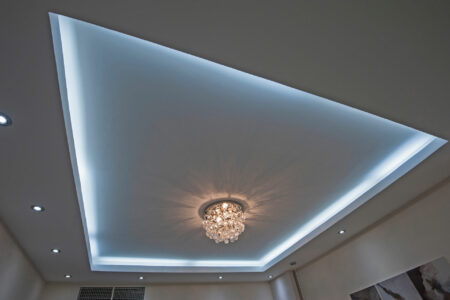
Switching on the LED strip
The WOW effect usually comes immediately after the first switch-on. Especially with the multicolored LED strips beautiful light effects can be achieved.
Solutions for possible problems
Even though the LED strips are quite easy to use, there may be some problems during installation or operation. Here you can find some common problems and solutions.
LED strips do not stick
If the LED strip does not stick well during installation, test it once on another surface. This way you can determine if it is the adhesive strip or the surface. Basically, the surface should be smooth and clean for the strips to stick well. Nevertheless, there are some painted surfaces or wallpapers where the adhesive strip simply does not stick.
Here you can try double-sided tape or mounting tape instead. This usually has a stronger adhesive effect than the standard adhesive strips. Even if the strips later peel off on their own and no longer stick, the stronger alternatives can be used.
LED tape mounting clips
If everything does not hold, various mounting clips can help. These are placed between the LEDs over the strip and fastened with a small screw.
Conclusion
With LED strips you can easily retrofit a great decorative lighting. The LED strips are very easy to use and can be installed without any expertise. You now know what to look for when shortening your LED strips and how to lay and fix them afterwards. The one-time effort for the installation is almost always worth it, because the great lighting effects are really fascinating.