Whether you’re using LED strips for decoration, interior design, or lighting, having a helpful step-by-step guide will make installation faster. Here you’ll learn how to choose the most suitable LED strip, their benefits, and how to connect LED strips.
Contents
Types of LED Strips
When it comes to the advantage of length and coverage, these three LED strip lighting solutions top the list: LED strip, LED flex, and LED rope.
First, the classic LED strip or LED tape, which is thin, flat, and can be cut for easy mounting. Second, the LED flex that fits for outdoor use because of its shock-proof and water-resistant ability.
Lastly, the LED rope is typically encased in PVC or silicone and is safe to bend and more suitable for decoration as they emit low-density light.
Based on their illuminating capacity and colors, LED strips can be further classified into the following categories:
Single-color LED strip
These LED strips only exhibit a single color variant which is commonly in white but available in other colors too.
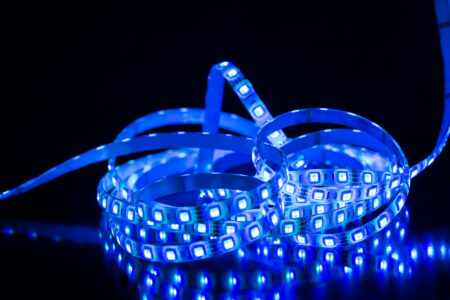
Multicolor or Color-changing LED strips
Red, green, blue, and sometimes white colors are combined in one strip. Other ranges of colors are available. The options are limitless.
White-colored LEDs added to multicolor strips tone colors by enhancing their density. Colors can be regulated to illuminate singly or mixed all together.
Tunable white LED strip
The lights can be adjusted according to density and temperature (cool, neutral, and warm), which transforms the ambiance of the place.
Tunable Multicolor LED strips
This is a combination of features from two previously mentioned LED strip variants.
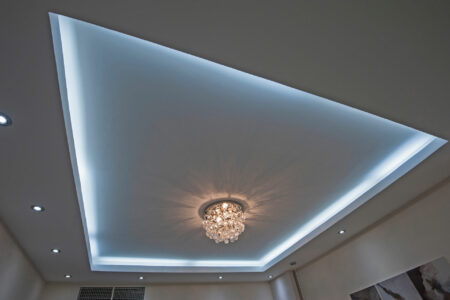
Advantages of Using LED Strips
LED strips are inexpensive, and their convenient shape and size allow efficient and hassle-free customization.
Listed below are the benefits of using LED strips in place of other lighting options:
Energy-saving and Eco-friendly
Compared to other lighting solutions, LED lights consume much less energy. On average, they consume 85% less energy than traditional lighting.
Using LED strips allows you to save money on electricity while helping the environment at the same time.
Bright With Minimal Heat Production
The brightness of a good quality LED strip can be at least 1,500 lumens per meter, which is comparable to the light output of a conventional fluorescent lamp.
Unlike your typical lighting solutions like incandescent halogen lamps that consume more electricity that converts to heat, LED strip lights are less likely to overheat.
Easy To Connect/Install
Skip the exhaustive and lengthy installation process that may require you to change wirings and use professional equipment.
Depending on which type you use, you can just stick your LED strips to the wall, connect it to power, and you’re good to go.
Cost-Effective and Long-Lasting
LED strips require minimal maintenance and they can last for several years depending on how they’re used.
Things To Consider When Buying LED Strips
Before you buy that LED strip, consider the following:
- The length of the LED strips- use measuring devices to survey the area where you plan to install your LED strips to identify how much you’ll use.
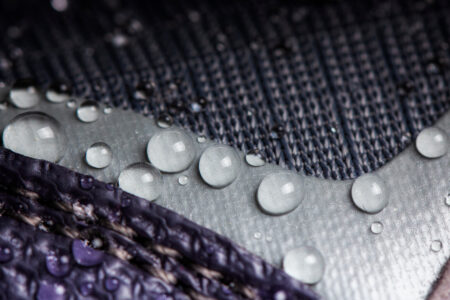
- Material type, quality, and durability- choose the ones with protective coating or PVC.
This is beneficial if you intend to place your strips in areas that make them prone to wear, moisture, and dirt build-up.
For example, consider waterproof strips for outdoor and aquarium lighting.
- Brightness and Consistency- the brightness of LEDs (measured in lumens) varies per product type, so be sure to look this up before you buy.
Consider the number of LEDs and note the distance between them if you want better light quality with increased output.
The illumination is smoother and straighter the more and closer LEDs are to each other.
- Colors and Temperature- whichever vibe or mood you prefer, there’s always equivalent lighting.
Step-by-Step Guide To Connect LED Strips
While there are plug-and-play LED strips that won’t require you to do extra work, most LED strip connections are still attainable through Do-It-Yourself methods.
This user-friendly guide is made up of easy steps that you can use if you wish to connect LED strips at your home.
Materials:
- Permanent adhesive/double-sided tape or hot glue
- Scissors
- Connecting devices or components
Procedure:
Step 1. Measure Your Strips
Base the length of your LED strips on the measurements you’ve made within the area where you intend to install your LEDs.
Step 2. Determine the Appropriate Voltage
Be sure to connect your LED strips to a matching power source. LED strips typically operate on low voltage.
This is crucial because insufficient or excess voltage may cause the LEDs to malfunction or burn.
Note: Ensure the LED strip is disconnected from the power supply before working with it.
Step 3. Ensure That the Surface is Flat, Stable, and Clean
This will aid better attachment, especially if we use adhesives. Be sure to dry the surface as well to get rid of moisture.
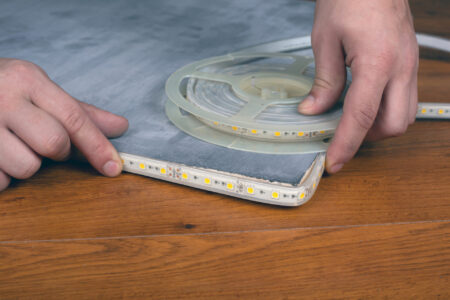
Step 4. Firmly Fix the LED Strip To the Surface
Some LED strips already have an adhesive backing to peel the protective film off.
If none, you can use plastic clips or permanent double-sided tape for better adherence.
You can also use hot glue. However, this may not stick properly to a concrete wall. Extra precaution is needed as this can potentially damage your LED strip.
Scotch tapes and superglue are not recommended.
Step 5. Cut Your Strips Properly
This step is only applicable if there is a need to eliminate excess or cut off some parts of the LED strip for enhanced adherence.
Make sure only to cut the designated cutting sections, which are marked with broken or dotted lines (sometimes with a scissors symbol), to avoid damaging your strip.
Step 6. Use a Connector to Join the Sections or Wires
There are two types of connectors that you can use: the fold-over and clip-on.
Refer to the product manual or the packaging to determine which connector is most suitable.
Properly align the wires/strip to the connector and make sure that it corresponds to their respective label.
Step 7. Plug Into a Power Source
Once everything is properly secure, connect your LED strip to the power source and watch the magic as it happens.