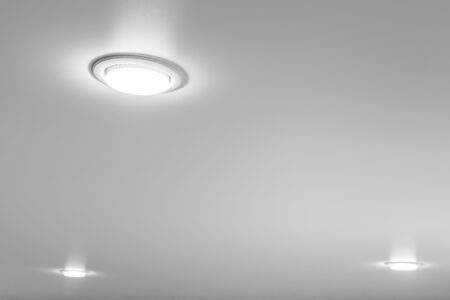
Recessed lights have many benefits like a consistent brightness throughout the room, less cleaning being required and some models can even adjust their angles where the light shines. But the installation is more complicated compared to other light fixtures. So let’s find out if a handyman can install your recessed lights.
Contents
Bearing in mind that the handyman may be the homeowner, family member, or full-time workman, there are two factors that must be taken into account.
- Is a handyman allowed to install recessed lights?
- Does the handyman know how to install recessed lights?
Let’s find out both factors.

Is A Handyman Allowed To Install Recessed Lights?
Two issues affect whether a handyman is allowed to install recessed lighting.
- State or local statutory regulations
- The conditions contained in the insurance policy cover the home
Most states have a contract value limit that applies to handyman projects. Once these limits are exceeded, many states require that the handyman obtains a general contractor’s license, which will also require insurance coverage.
This obviously does not apply to the homeowner, relative, or family friend doing the work as a favor, for free. Most states also require a trade-specific qualification if the handyman works on plumbing, electrical, or HVAC projects.
There are two stages needed to install recessed lighting.
- The physical installation
- The electrical connections
The physical installation can be carried out by a handyman. The electrical connections must be installed by a licensed electrician.
Does The Handyman Know How To Install Recessed Lights?
There are six simple steps that the DIY handyman can follow to install recessed lighting.
- Draw a plan and wiring diagram
- Check The Ceiling For Obstructions
- Mark The Lighting Units Location
- Drill The Holes For The Lighting Units
- Install The Light Fittings
- Test The Installation
A Handyman Can Easily Install Recessed Lights
By following the steps listed below, a handyman can install recessed lights.
Draw A Plan
Spend some time drawing an accurate layout diagram to scale.
The Physical Installation Plan
First, make a scale plan drawing (from above looking down) of the room, clearly marking the lengths of the walls and how they are positioned relative to the ones next.
Once the outline of the room is complete, mark the proposed locations of each of the lights. Lighting for general luminescence (as opposed to lighting used to highlight a feature) should be positioned closer to the center of the room.
If you intend to install a single row of recessed lights, it should ideally be a strip down the center of the room. If there are two or more rows, each side should be positioned 2 ½ feet from each wall. At this location, they will provide a wide radius of light.
If the room is big enough, space the lights an equal distance apart. The distance between light fittings should be the same as the distance from the walls. Not only does this look more aesthetically correct, but it will also ensure that the light is spread around the room equally.
The Cabling Plan – Wiring Diagram
Identify where you will draw the power supply and mark this position on the plan. If this is a retrofit (upgrade) of an existing room, which already has the power supply to lights, mark the position of the switch(es).
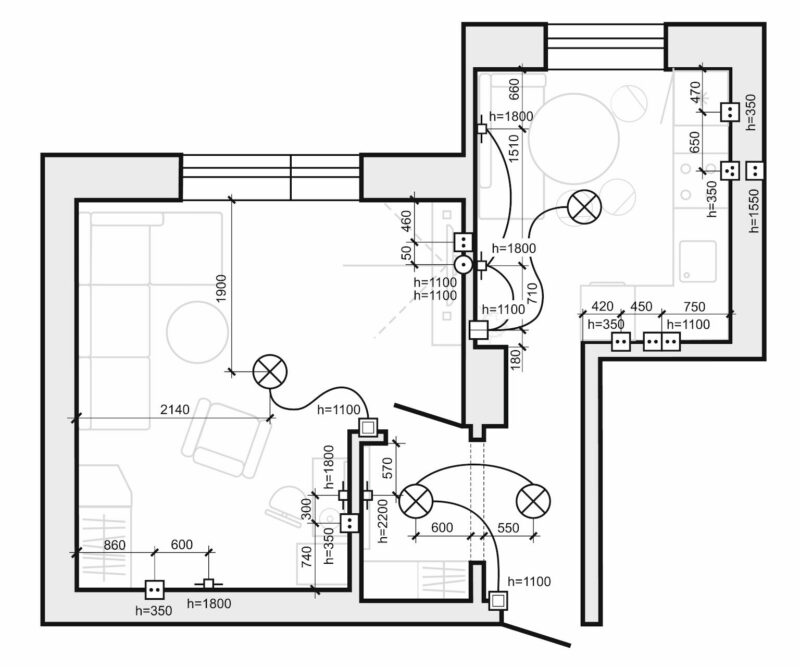
Measure the cable length to wire from the switch to each light fitting. When you purchase the cabling, always ensure that you add at least 30% to your total length. This makes allowance for changing the routing of the wire and allows for detours around unanticipated blockages.
The lights will be connected in parallel to the circuit. There are several benefits to this, the main one being that if one unit becomes faulty, the others continue working.
Start The Installation Of The Recessed Lights
The physical installation process of each light is listed below.
Check The Ceiling For Obstructions
Once your plan is drawn, locate the “real life” positions of the lighting units, and verify that there is no obstruction behind the ceiling, which may prevent you from installing the lighting units.
The obstruction could be as follows.
- Ceiling joists
- Electrical cabling
- HVAC ducting
- Water Pipes
- Gas Pipes
- Ethernet Network cabling
Always remember that more of the unit is behind the ceiling than seen from below. If you find obstructions, be prepared to discard your plan and redo it.
Mark The Lighting Units Location On The Ceiling
Once you have identified that there is sufficient room, we recommend that you use a log with enough straight edges or string and hold each end down the length of the room in the position of each line of lights.
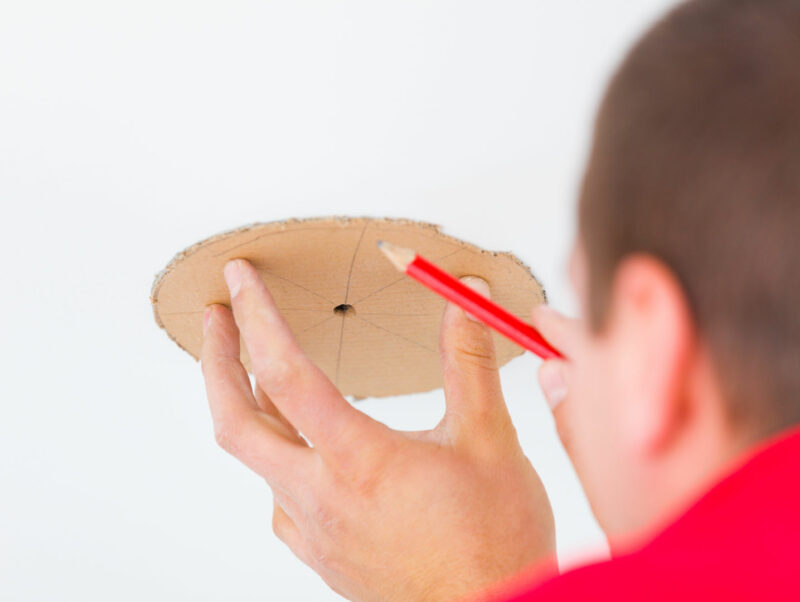
This enables you to easily drill a pilot hole for each light accurately measured in a straight line.
Drill The Holes For The Recessed Lighting Units
Select the correct sized hole drilling cutter which matches the units you are installing. While the specifications will be detailed in the light fitting installation instructions, the list below shows the typical sizes required.
| Round Recessed Light | Overall Housing (Trim) Size | Cut-Out Hole Size | Wattage |
| 2.00 inch Round | 1-15/16 inches | 1 ⅝ inches | 3 Watts |
| 2.25 inch Round | 2-1/4 inches | 1-7/8 inches | 3 Watts |
| 3.15 inch Round | 3-1/16 inches | 2-13/16 inches | 3 Watts |
| 3.15 inch Round | 3-1/16 inches | 2-13/16inches | 9 Watts |
| 3.50 inch Round | 3-9/16 inches | 3 inches | 3 Watts |
| 3.50 inch Round | 3-9/16 inches | 3 inches | 9 Watts |
| 3.50 inch Round | 3-9/16 inches | 3 inches | 10 Watts |
| 4.20 inch Round | 4-3/16 inches | 3 ⅝ inches | 6 Watts |
| 5.00 inch Round | 5-3/16 inches | 5 ⅝ inches | 15 Watts |
| 6.00 inch Round | 6-3/16 inches | 6 ⅜ inches | 15 Watts |
| 7.00 inch Round | 7-3/16 inches | 8 ⅜ inches | 18 Watts |

Before you drill all of the holes, just drill the first one. Then make sure the recessed light fixture fits in correctly.
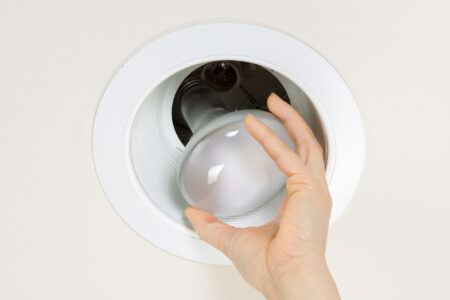
Install The Light Fittings
You need to follow the installation instructions that came with the fittings. These will vary from model to model and depend on whether the recessed lights are can or flush-mounted fittings.
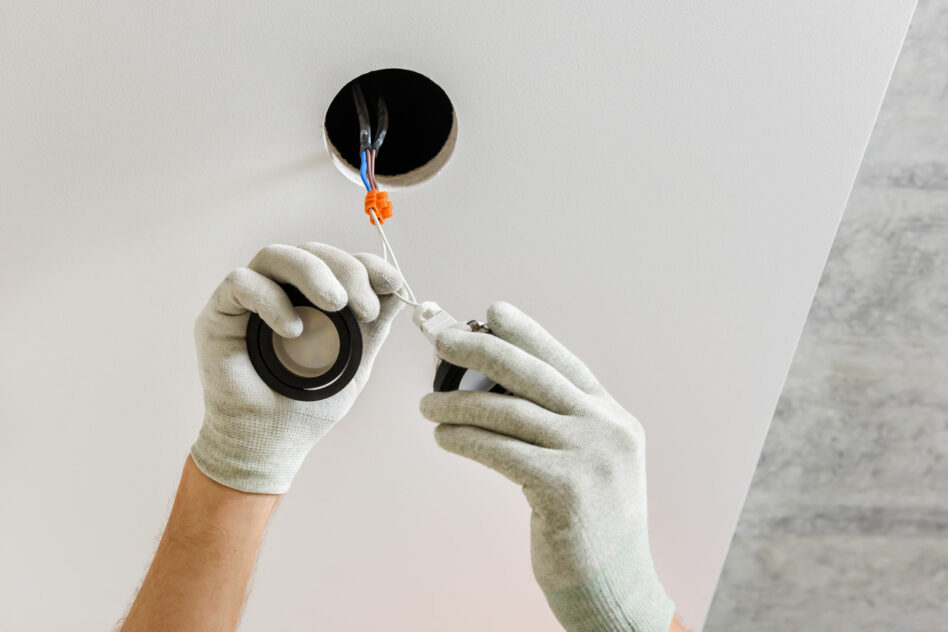
Run And Connect The Electrical Wiring For The Fittings
By law, this step must be performed by a licensed electrician.
Before starting this step, switch off the main trip switch at the DB board.
Test The Installation
Verify that all the connections are secure and completed in the correct sequence (marching colors). Switch the DB breaker back on. Turn the lights on and enjoy the fruits of your labor.
If they do not work, turn the DB board breaker off and check that each connection is secure.
- The copper conductors contact the light fittings connections
- The colors of the wires are connected to the correct points.
Three things may have gone wrong if some of the lights work and others don’t.
- The power supply to the non-working lights is not intact.
- The light fittings (or bulbs) are defective.
- The color connections of the wires are incorrect.