It is easy to remove light bulbs fit in open spaces. But in the case of recessed lighting, it can be very difficult to remove them. The reason for this is that in recessed lighting installations, you cannot put your hands in to remove the light bulb because of its hollow opening. In this guide we will show you some tips and tricks how to remove your light bulb from a recessed socket.
Contents
Removing light bulbs from a recessed socket
It is a difficult task to detach light bulbs from a recessed socket. But some methods can help make it possible. These methods include using duct tape, removing the retaining collar, buying a bulb changing kit, or using a general-purpose suction cup. Below we will describe every method in detail.
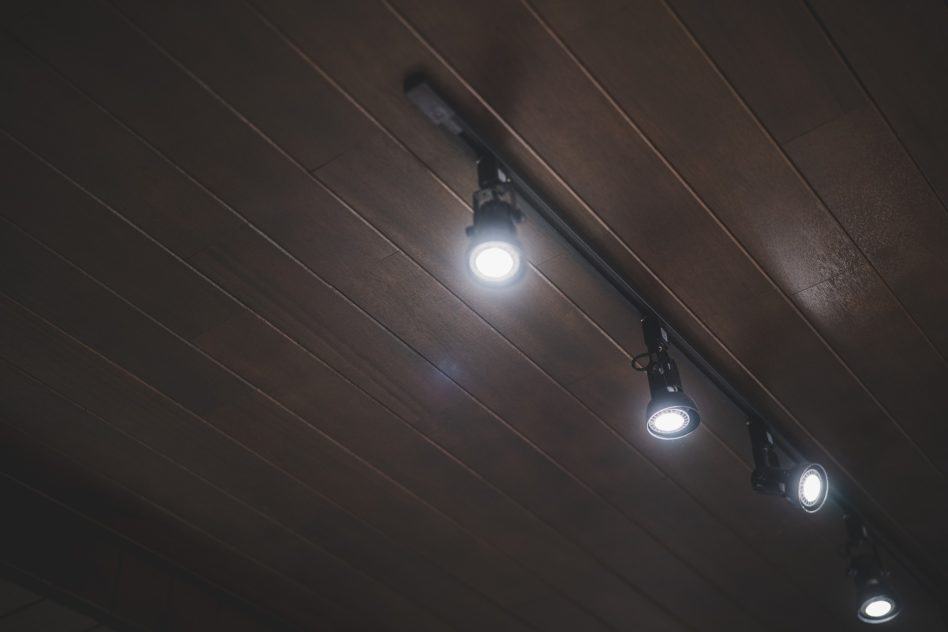
What are recessed lights?
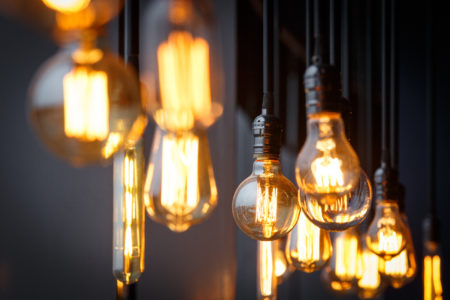
Recessed lights are lights fitted in a sunken space in the ceiling of any building space. This is a modern way of lighting a dimly lit area. It gives a more attractive appeal to where they produce the light. There are many reasons why recessed lights are remarkable. They are classy, efficient, effective, and good for a home that has a low ceiling. The only problem is that it is difficult to remove and change their bulbs.
Methods to remove a light bulb from a recessed socket
Many people have found it difficult to remove a light bulb from a recessed socket. Some have even gone to the extent of breaking the bulb and using pliers to turn the bulb around and unscrew it, with the power turned off. But this method is highly messy. It could be your last-ditch effort. Before doing this, why not try some of the methods given below?
Using duct tape
One of the best ways of removing light bulbs from recessed sockets is by using duct tape. Before proceeding to do this method, ensure first that the bulb is not hot. And make sure that there is no electricity going to the light fixture.
Cut a 30-cm or 12-inch duct tape. Make a handle structure by folding the ends of the duct tape towards the center. Then stick the middle part of the tape to the bulb. Using the tape handles, unscrew the bulb by turning the bulb counter-clockwise. Continue turning until part of the bulb is out of the hollow area of the socket.
Another way of using your duct tape is by wrapping it in a circle with the sticky part outside. The circle should be large enough to fit your hand through it. Then stick the duct tape to the flat surface of the recessed bulb. Put your hand through the handle and turn the bulb counterclockwise to unscrew it.
When part of the bulb is out of the hollow area, you can then finish unscrewing it by hand. Wear gloves if you think the bulb might break. This will give you more safety as you work. If you need to replace the old bulb, use the same method to put the new bulb in the recessed socket. This time, turn the bulb clockwise to screw it in.
Removing the retaining collar
A retaining collar holds some recessed light bulbs in place. This metal collar keeps the bulb in place. You should exercise caution when handling the metal collar because it can break. And if you damage it, then you will have to spend on its repair. There are different types of metal collars used for light fixtures. There are also some fixtures where the retaining collar is the outer ring while in others, it is the inner ring.
Make sure to know whether it is the outer or inner ring to avoid damaging your light fixture. Sometimes the metal collar is painted over. In this situation, you need to take out the paint first before attempting to remove the collar. When this is done you can remove the metal collar. Some collars have screws and others are held in place with a button. If the metal is held by screws, simply unscrew them to remove the metal collar.
If a button holds the collar, press, push, or hold the button that the metal retaining collar is unlocked. If the metal collar is jammed in the fixture, you can use a screwdriver or a utility knife. Put the screwdriver or knife in the gap between the light fixture and the metal collar. Put a little pressure to open the collar, making sure not to break it. When the metal collar is removed, it will then be easy to remove the light bulb.
But if there are no screws or buttons on the metal collar, find out if the collar ring can be pulled out vertically or twisted counterclockwise. Try pushing the bulb upwards with two fingers, grab the inside of the housing ring and pull it downwards. If this still doesn’t work, use a screwdriver to pry the housing out. Stick the screwdriver head between ring and bulb and pry outwards. Make sure the bulb doesn’t break and don’t stay underneath it.
Other methods if duct tape or removing the retaining collar doesn’t help:
Using a bulb changer with an extension pole
A bulb changer can connect to the light bulb so that you can unscrew it. Make sure to position the cup of the bulb changer carefully so that it sticks right to your recessed bulb. Then twist the pole counter-clockwise until the bulb is completely out. Even if you are not touching the bulb with your hands, make sure that you remove it when the switch is turned off.
Using a suction cup
You can also use a general suction cup that can grip a light bulb. Make sure to adjust the suction power, then turn the handle counterclockwise to unscrew the bulb.
Seek professional help
If the grip of the bulb on the socket it very tight, seek the help of a professional electrician.
Conclusion
If you have recessed lighting in your home, you will no longer have a problem in case you need to remove the bulb from its socket. With the methods given above, you can now easily remove your light bulbs from recessed sockets. Just make sure to be careful and cautious when doing so in order not to break the bulb or damage the light fixture itself. Wearing gloves while removing the bulbs would be good for additional safety.